
You know the importance of a flawless auto body paint finish that seamlessly blends in with the existing color. Whether you’re a car enthusiast or a professional in the automotive industry, achieving the perfect paint match is crucial. In this detailed guide, we will walk you through the step-by-step process of auto body paint matching, providing you with the expertise and knowledge you need to ensure a pristine finish every time.
Key Takeaways:
- Color Matching Process: Understanding the color matching process involves utilizing tools like color spectrophotometers and color chips to accurately match the vehicle’s paint color.
- Surface Preparation: Properly preparing the surface by sanding, cleaning, and priming is crucial to achieving a seamless paint match and ensuring long-lasting results.
- Professional Assistance: Seeking help from experienced auto body professionals can guarantee a precise paint match, especially for complex or multi-tone colors that may require advanced techniques and expertise.
Evaluate Damage
Assess paint area
Before exploring into the process of auto body paint matching, it is crucial to thoroughly evaluate the extent of the damage on the vehicle’s paint. Start by examining the affected area to determine the size and severity of the imperfections. Look for scratches, chips, or fading paint that may need to be addressed during the paint matching process.
Identify damage extent
There’s more to damage assessment than meets the eye. Identifying the extent of the damage involves determining whether the paint damage is superficial or if it has penetrated deeper layers of the vehicle’s surface. This will help in deciding the appropriate refinishing techniques needed to achieve a seamless paint match.
Identify if the damage is localized to a small area or if it has spread across multiple panels. This will influence the scope of the paint matching process and whether a spot repair or a full-panel repaint is necessary to achieve an optimal match.
Find Paint Code
Check vehicle manual
There’s no better place to start looking for your vehicle’s paint code than in the manual. The manufacturer often includes this necessary information in the manual to help you easily identify the correct paint color for touch-ups or repairs.
Locate identification plate
Clearly, another way to find the paint code is to locate the vehicle’s identification plate. This plate is usually found in the driver’s side door jamb or under the hood. The paint code is typically listed as a series of numbers or alphanumeric codes on this plate.
The identification plate may also contain other useful information such as the VIN (Vehicle Identification Number) and manufacturing date. Knowing where this plate is located on your vehicle can save you time and make the paint code search process much more efficient.
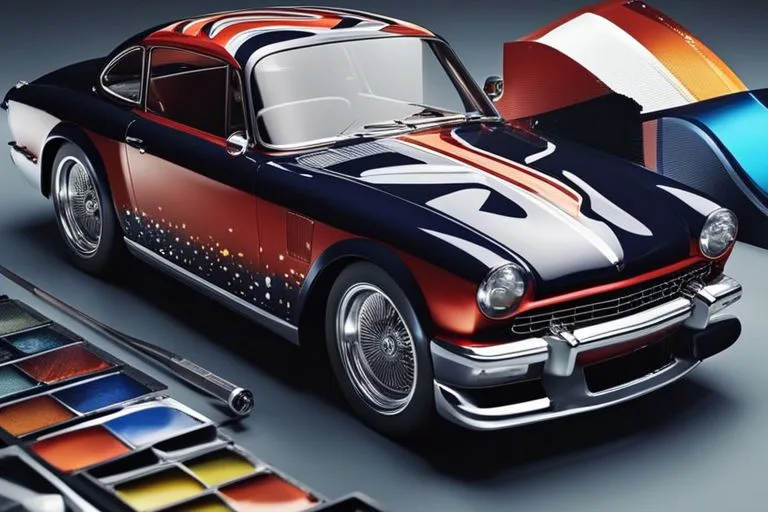
Choose Matching Paint
Select appropriate type
On selecting the appropriate type of paint for your auto body repair job, it is crucial to consider factors such as the type of surface you are working on, the location of the repair, and the overall look you are aiming to achieve. Whether you need touch-up paint, aerosol spray paint, or a brush-on application, matching the type of paint to your specific needs is crucial for a seamless finish.
Consider paint finish
On considering paint finish, it is important to think about the level of gloss or shine that will best match the existing paint on your vehicle. Factors such as weather conditions, exposure to sunlight, and the overall aesthetic of your car should all be taken into account when selecting a paint finish. Matte, satin, or gloss finishes are all available options, each providing a different look and level of durability.
This decision can significantly impact the overall appearance of your vehicle and how well the paint will blend with the existing finish, making it crucial to choose wisely.
Prepare Workspace
Clean environment
All auto body paint jobs should be done in a clean and dust-free environment to ensure a smooth and flawless finish. Assuming you are working in a garage or workspace, make sure to clean the area thoroughly before beginning the paint matching process. This includes sweeping the floor, dusting surfaces, and removing any items that could potentially contaminate the paint.
Gather materials
Any successful auto body paint matching begins with having the right tools and materials at your disposal. Gather materials such as sandpaper, masking tape, rubbing alcohol, paint primer, and of course, the paint itself. It is important to have everything organized and easily accessible before you start the process.
The quality of the materials you use can significantly impact the final result of your paint matching. It’s recommended to invest in high-quality sandpaper and paint to ensure a professional-looking finish. Additionally, having an organized workspace will help you work more efficiently and avoid any unnecessary delays during the painting process.
Surface Preparation
Wash surface
Now, before you start the auto body paint matching process, it is crucial to ensure that the surface you will be working on is clean and free of any dirt, oil, or contaminants. Any residue left on the surface can interfere with the paint adhesion and ultimately affect the color matching result.
Sand if necessary
Any imperfections such as minor scratches or paint flaking must be addressed before proceeding with the paint matching. You can use sandpaper to gently buff out these imperfections, creating a smooth surface for the new paint to adhere to. Remember to feather the edges of the sanded area to blend it seamlessly with the surrounding paint.
You may also need to sand down any rough patches or uneven surfaces to ensure a smooth and uniform paint application. Take care not to oversand, as this can damage the underlying layers of paint and create more problems in the long run.
Wash
After sanding, it is vital to wash the surface again to remove any dust or debris produced during the sanding process. Use a gentle automotive soap and water solution, and make sure to dry the surface thoroughly before moving on to the next step in the paint matching process.
Primer Application
Mix Primer
Any successful auto body paint job starts with the proper application of primer. Mixing the primer correctly is crucial to achieve a smooth and even base for the paint to adhere to. Follow the manufacturer’s instructions carefully on the ratio of primer to activator to ensure the best results.
Apply Evenly
On the prepared surface, it is crucial to apply the primer evenly to prevent any inconsistencies in the final paint job. Any areas that are missed or applied too thickly can result in a patchy finish. Take your time and use smooth, overlapping strokes to ensure full coverage.
Applying the primer evenly not only provides a uniform base for the paint but also helps in achieving a professional-looking finish. Once the primer is applied, allow it to dry completely before moving on to the next steps in the painting process.
Color Coating
Mix paint
Your first step in the color coating process is mixing the paint. Some auto body shops use computerized systems to precisely match the color of your vehicle. This ensures an accurate color match that seamlessly blends with the existing paint.
Spray layers
For a professional finish, the color coating process involves applying several spray layers of paint. Each layer must be applied evenly and allowed to dry before the next layer is added. This method creates a smooth and uniform color that matches the rest of your vehicle flawlessly.
For spray layers, it’s imperative to follow the manufacturer’s instructions for the type of paint being used. Different paints may require specific techniques for optimal results. It’s also crucial to pay attention to the drying times between each coat to prevent any issues with the final finish.
Any imperfections or mistakes in the color coating process can result in a mismatched or uneven appearance. This is why it’s best to trust this job to professionals who have experience and expertise in auto body paint matching.
Blending Techniques
Learn blending methods
To ensure a seamless auto body paint match, mastering blending techniques is crucial. Assuming you have the correct paint color and tools, blending involves feathering the new paint into the existing color to create a smooth transition. This technique requires practice and precision to achieve professional results.
Practice before application
An imperative step before attempting blending is practice. With a spare piece of metal or a practice panel, practice blending the paint to get a feel for the process. This allows you to refine your technique and gain confidence before working on the actual repair area.
Clear Coating
Mix clear coat
Not all clear coats are created equal, so it’s imperative to mix the clear coat according to the manufacturer’s instructions. Failure to do so can result in a mismatched finish or a lack of durability. Always double-check the mixing ratios and use the correct tools to ensure a smooth application.
Apply protectively
Any professional auto body painter knows the importance of applying clear coat protectively. This step not only adds a glossy finish to your paint job but also serves as a protective barrier against UV rays, chemicals, and scratches that could damage the underlying paint.
You’ll want to make sure the clear coat is applied evenly in uniform coats to achieve a smooth and consistent finish. Allow each coat to dry completely before applying the next layer to prevent any imperfections.
Clear coating is the final step in the auto body paint matching process, and mastering this step is crucial for achieving a flawless finish. Take the time to mix the clear coat correctly and apply it protectively to ensure your paint job looks professional and lasts for years to come.
Drying and Curing
Allow time
Many people are eager to see the final results of their auto body paint job, but it is crucial to allow the paint to dry and cure properly. Rushing this process can lead to a poor finish and may even result in the paint not adhering correctly to the surface.
Assess curing process
The key to a successful paint job lies in the curing process. Assuming the paint has been applied correctly, the curing process is what will ultimately determine the longevity and durability of the finish. It is vital to follow the manufacturer’s recommendations for curing times and methods to ensure the paint fully sets and hardens.
Any shortcuts taken during the curing process can result in a subpar finish that is prone to chipping, fading, or peeling. Patience is crucial when it comes to allowing the paint to fully cure, as this will ensure a high-quality and long-lasting result.
Inspection and Touch-Ups
Evaluate job
You’ll want to start by carefully inspecting the newly painted auto body to ensure that the color matches seamlessly with the rest of the vehicle. Look for any inconsistencies in the paint application, such as color variations or texture differences, that may require touch-ups.
Correct imperfections
You can address any imperfections by sanding down the affected area and feathering the edges to blend the paint smoothly into the surrounding surface. This process may involve applying additional layers of paint to achieve a perfect match with the vehicle’s original color.
To ensure a flawless finish, it’s crucial to take your time and pay attention to detail when correcting imperfections. Use fine-grit sandpaper to gently smooth out any rough spots or uneven surfaces, and be sure to clean the area thoroughly before applying touch-up paint. Do not forget, patience and precision are key to achieving professional results.
Polish and Finish
Polish for shine
One vital step in achieving a flawless paint matching finish is to polish the freshly painted surface. Polish helps to remove any imperfections, such as swirl marks or scratches, giving your vehicle a smooth and glossy appearance.
Wax for protection
You’ll want to apply wax to the polished surface to not only enhance the shine but also provide a protective layer against environmental elements. Wax acts as a barrier, shielding the paint from UV rays, dirt, and other pollutants that can dull its appearance over time.
The type of wax you choose can make a significant difference in the longevity and effectiveness of the protection it provides. Look for a high-quality carnauba wax or a synthetic sealant to ensure lasting results. Remember to apply the wax in a thin, even layer using a clean microfiber cloth for best results.
Conclusion
Presently, with the help of this step-by-step guide, you now have a solid understanding of how to achieve auto body paint matching. By following these carefully outlined steps, you can confidently tackle paint matching projects with precision and efficiency. Keep in mind, attention to detail and patience are crucial when striving for seamless paint matching. With practice and the right tools, you can achieve professional results and restore the aesthetic appeal of any vehicle.
FAQ
Q: What is auto body paint matching?
A: Auto body paint matching is the process of matching the exact color of paint on a vehicle’s body panels in order to seamlessly blend repairs or touch-ups with the existing finish.
Q: Why is auto body paint matching important?
A: Auto body paint matching is important to ensure that any repairs or touch-ups done on a vehicle are virtually undetectable. Matching the paint color precisely is crucial for maintaining the value and appearance of the vehicle.
Q: How can I achieve a perfect auto body paint match?
A: To achieve a perfect auto body paint match, you can follow these steps:
1. Start by determining the exact paint code of your vehicle.
2. Use high-quality paint and materials for the best results.
3. Prepare the surface properly by sanding, priming, and applying a base coat.
4. Apply the paint using the right technique, such as spray gun or touch-up brush.
5. Allow the paint to dry completely before finishing with clear coat for a seamless blend.